Getting Started: Writing a Boo Plugin
Support
Support for Boolang(Boo) has been slowing over the past years, and Boo seems to be moving towards deprecation. While it's still currently supported in Empeld, if you're looking to write a plugin, we recommend taking a look at C# instead.
Disclaimer
These tutorials assume that you know how to write basic code. This includes things like functions and mathematical expressions. If you don't yet know how to program, I recommend you check out the Python courses on Code Academy.
First things First
I'd highly recommend starting by grabbing a good text editor. My favorite is Sublime. What's great about this is it also has a plugin for Boo syntax highlighting here
You can also use VS Code, which also has syntax highlighting.
Create your folders
Open the folder where you installed the game (You can find this
folder name at the bottom-right of the launcher). - Go into the folder
'plugins'. - Make a new folder entitled myplugin or whatever you
like (You just have to remember it. I recommend not putting in spaces.).
All your code and resources (textures, models, etc) go in this folder.
There are example boo plugins in the boo-plugin-examples folder in
the game directory that you can look at if you'd like. For now, we'll
skip those and start by making a world.
Boo Language
Boo is a python-like language that compiles to be near-native code (C# JIT'd) (Rather than running in an interpreter like python). This makes it perfect for games, because it has the flexibility of formatted and weak-typed code, but can still be blazingly fast. There are some catches to this, so make sure to read the Boo performance tricks.
If you didn't understand that, don't worry. Just think of Boo as a powerful and fast language.
Project Setup
After creating the folder for your plugin, you need to put a file in it
to tell the game about itself. This file is called <u>init</u>.boo
(after what python does). Note that there are TWO underscores before and
after init. So it's _ _ i n i t _ _ . b o o
You will see this info in the singleplayer UI, so pick good names.
#reference "pluginbase.dll"
#reference "plugins/essentials.dll"
#include "macros"

@Meta Title "TestPlugin"
@Meta Description "My First Plugin!"
@Meta Company "My Sweet Company"
@Meta Version "0.1.0.0"
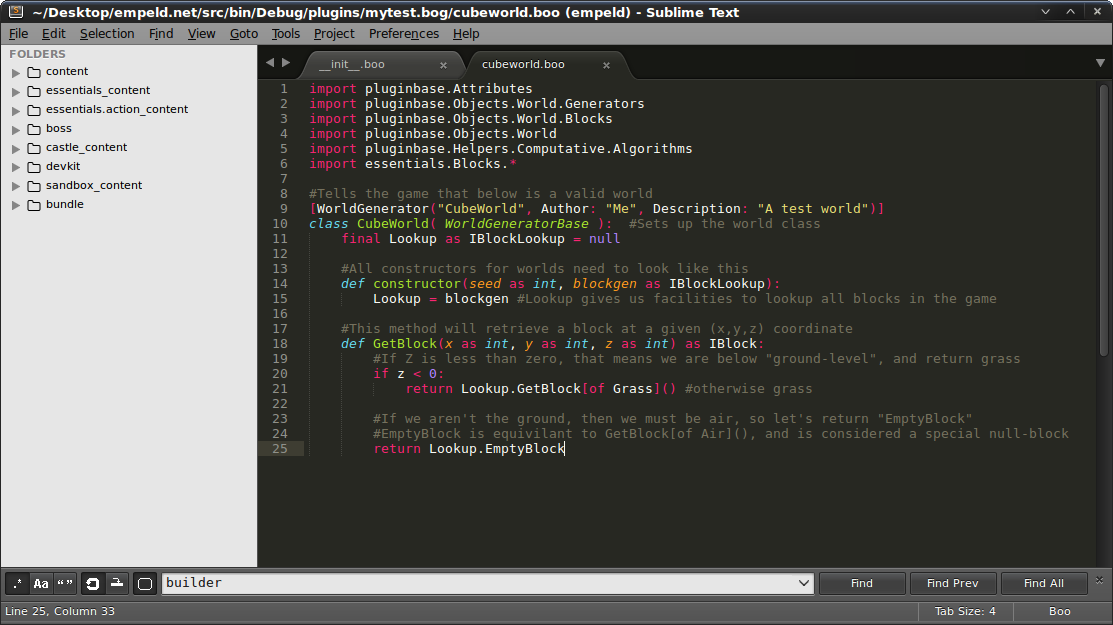
Writing your first world
After we write a init file, let's write our first world. I'd recommend reading Deterministic random numbers first to understand how pseudo-random numbers work.
The core concept of world generation is this: Given a 3D point (x,y,z),
you need to return what is at that point. Z defaults to up. So, if you
are at point 0,0,0, you might return Rock, but 0,0,1 might
return air.
import pluginbase.Attributes
import pluginbase.Objects.World.Generators
import pluginbase.Objects.World.Blocks
import pluginbase.Objects.World
import pluginbase.Helpers.Computative.Algorithms
import essentials.Blocks.*

#Tells the game that below is a valid world
[WorldGenerator("CubeWorld", Author: "Me", Description: "A test world")]
class CubeWorld( WorldGeneratorBase ):  #Sets up the world class
    final Lookup as IBlockLookup = null

    #All constructors for worlds need to look like this
    def constructor(seed as int, blockgen as IBlockLookup):
        Lookup = blockgen #Lookup gives us facilities to lookup all blocks in the game

    #This method will retrieve a block at a given (x,y,z) coordinate
    def GetBlock(x as int, y as int, z as int) as IBlock:
        #If Z is less than zero, that means we are below "ground-level", and return grass
        if z < 0:
            return Lookup.GetBlock[of Grass]() #otherwise grass

        #If we aren't the ground, then we must be air, so let's return "EmptyBlock"
        #EmptyBlock is equivilant to GetBlock[of Air](), and is considered a special null-block
        return Lookup.EmptyBlock
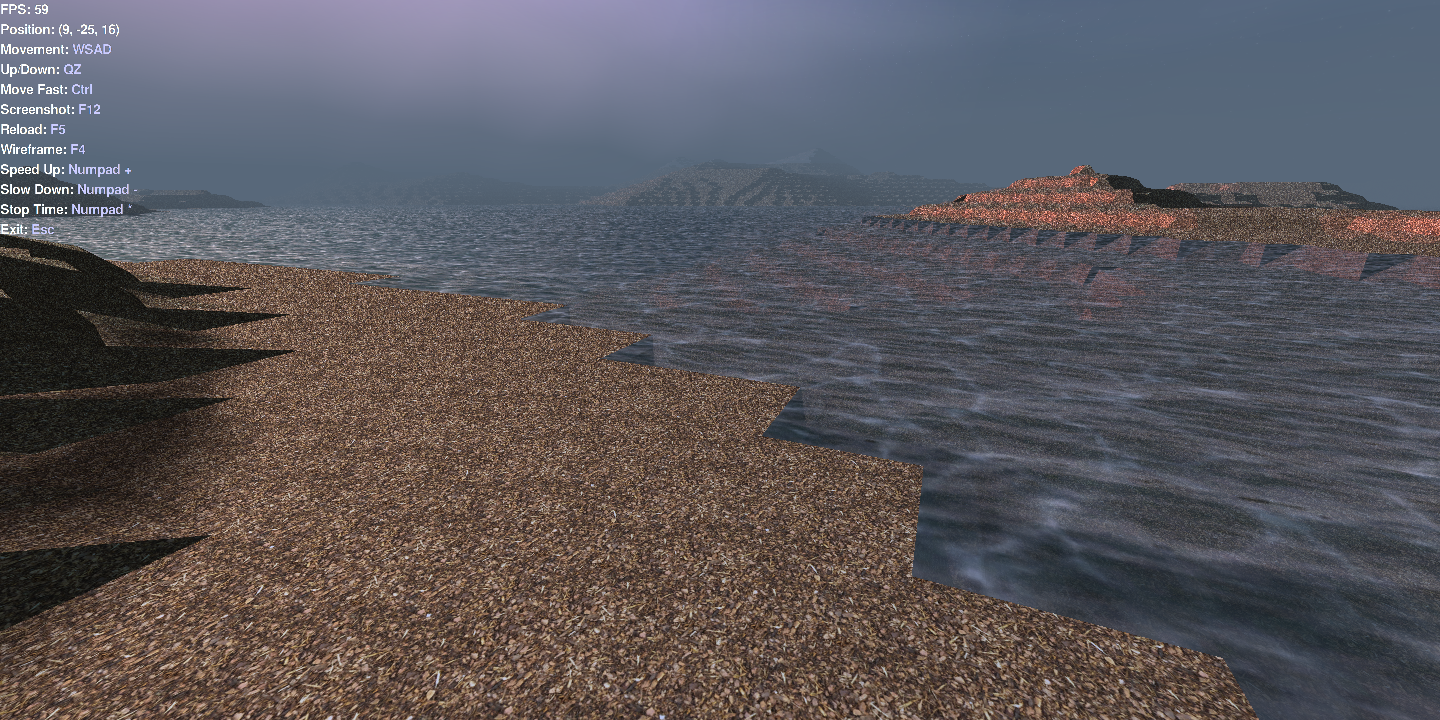
Running the game in DEV mode
Empeld has a special mode built-in called Dev mode. This allows us to do a few things:
- We can start up the game to preview things like world and atmosphere
- We don't need to login to our account to do it
- The game will automatically watch for changes in the code and reload if something changed
We can start the game in dev-mode by running the following in a command window:
empeld.exe --dev --plugins essentials,myplugin --world CubeWorld
This tells the program 3 things:
- Start in dev mode
- Load the plugins
essentialsandmyplugin - Use the world
CubeWorld
You can use Q to go up, Z to go down, WSAD to move around, and mouse to look. Go exploring!
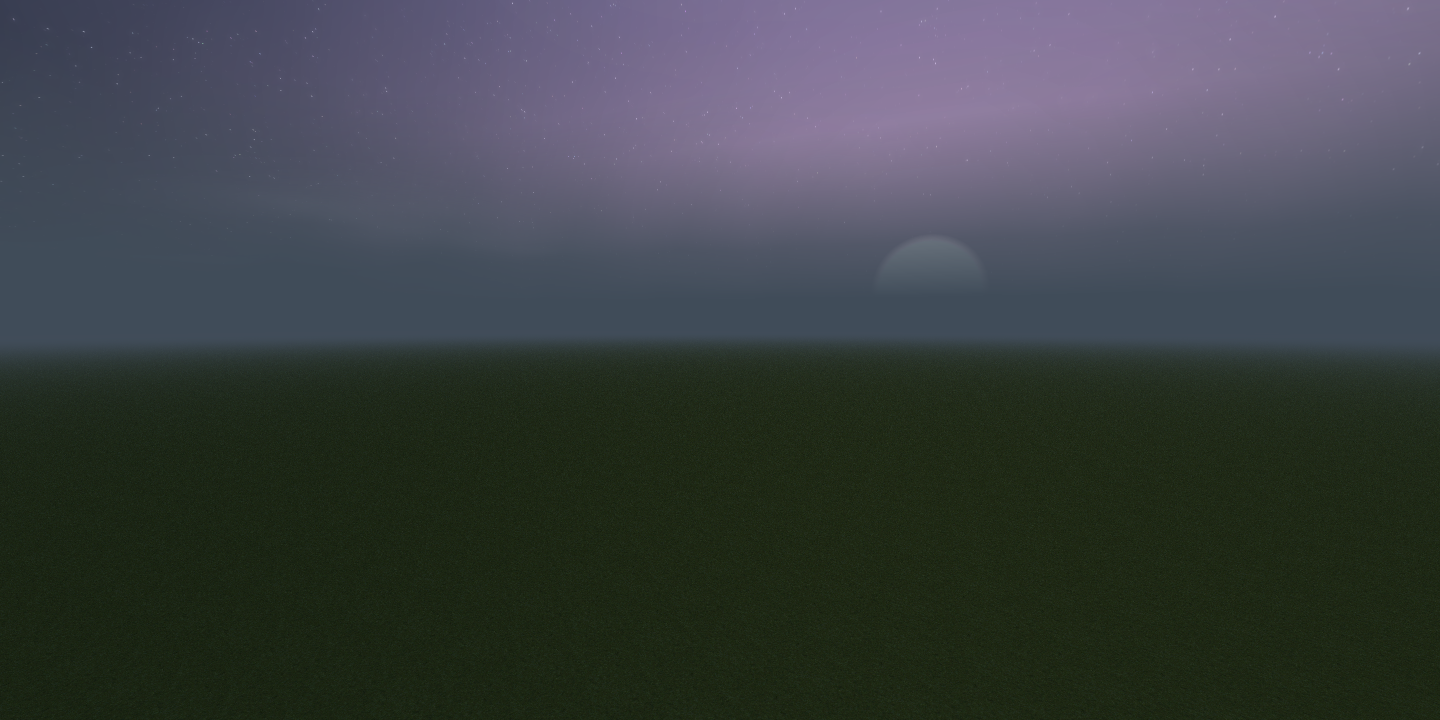
You should see something similar to this:
Making the world have hills

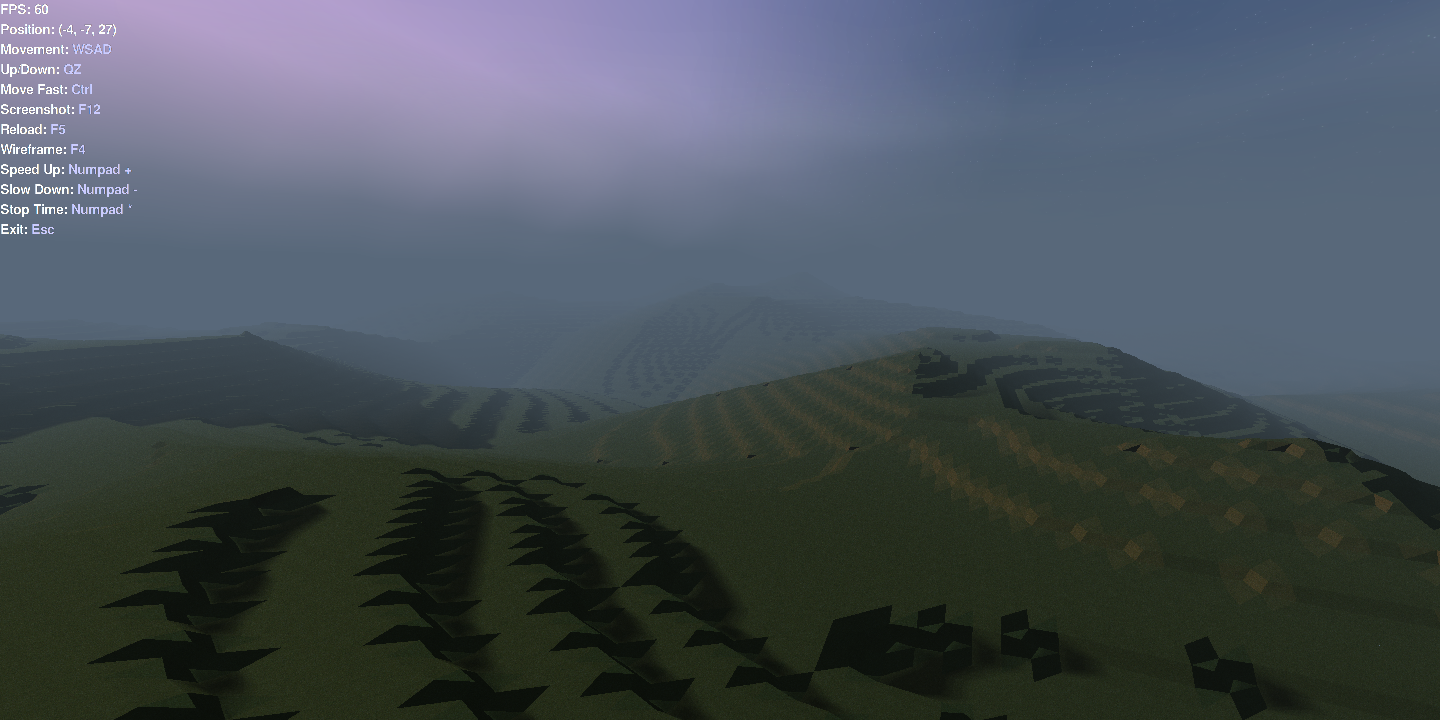
You probably don't want just a flat world, so let's give it some hills. To achieve this, we will use an algorithm called Perlin Noise.
Here's an example of a 2D Heightmap of what perlin noise looks like:
Let's take a look at how we modified the code in the above example:
      #Create some noise
      heightmap = Perlin(seed=0, frequency=48, levels=2)

      #All constructors for worlds need to look like this
      def constructor(seed as int, blockgen as IBlockLookup):
          Lookup = blockgen

      #This method will retrieve a block at a given (x,y,z) coordinate
      def GetBlock(x as int, y as int, z as int) as IBlock:
          height = heightmap.GetValue(x, y, min=0, max=32)

          #If z < lvl, then that mean's that the block we're checking is in the ground
          if z < height:
              return Lookup.GetBlock[of Grass]()

          #If all else fails, we know that we must be in Air, so return EmptyBlock
          return Lookup.EmptyBlock
The first thing you'll notice is we're creating a new variable called
heightmap with perlin. We give it a few values:
- Seed: The seed of the noise (Part of Deterministic random numbers
- Frequency: How far apart the peaks and tops are
- Levels: How many layers of noise are on top of each other (Higher numbers = more noisy)
Then, in GetBlock we call GetValue on it, with a given
coordinate, and ask for a number between min and max. We'll use
the return of this as our height and anything below it will be solid
ground.
Here's an example of what you might see:
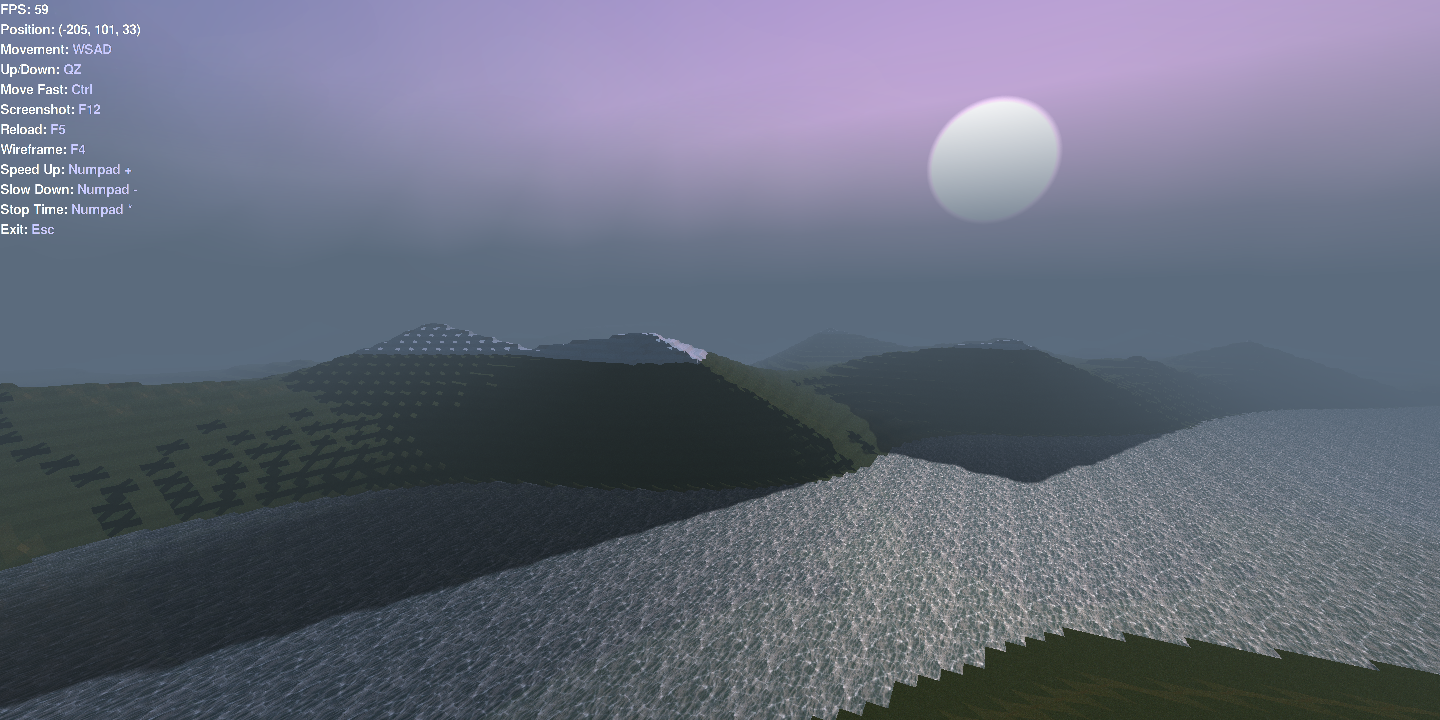
Snow Tops and Water
Now let's mix it up a bit. Let's add some Water to the valleys, and make the peaks covered with snow. I encourage you to try this on your own before looking at the answer.
Here's how I modified my GetBlock method:
      def GetBlock(x as int, y as int, z as int) as IBlock:
          height = heightmap.GetValue(x, y, min=0, max=32)

          #If z < lvl, then that mean's that the block we're checking is in the ground
          if z < height:
              if z > 25:
                  return Lookup.GetBlock[of Snow]()
              return Lookup.GetBlock[of Grass]()

          if z < 15:
              return Lookup.GetBlock[of Water]()

          #If all else fails, we know that we must be in Air, so return EmptyBlock
          return Lookup.EmptyBlock
Customize the world!
Now is a good time to take a second and customize your own world!
Play around with the values, and use a few different types of blocks. They each have different properties and appearances, so have fun!
Here's a short list of some good ones to start with:
- BeachSand
- CrackedDirt
- Dirt
- Ice
- Grass
- Moss
- RockyGrass
- Sand
- Snow
- Water
- Lava
- Algae
- MirkyWater
You can see a full list of blocks in the API Documentation.
Creating a new block
Essentials provides a lot of blocks you can use to make your world. But what if you want one that doesn't exist? Well then, just make it yourself!
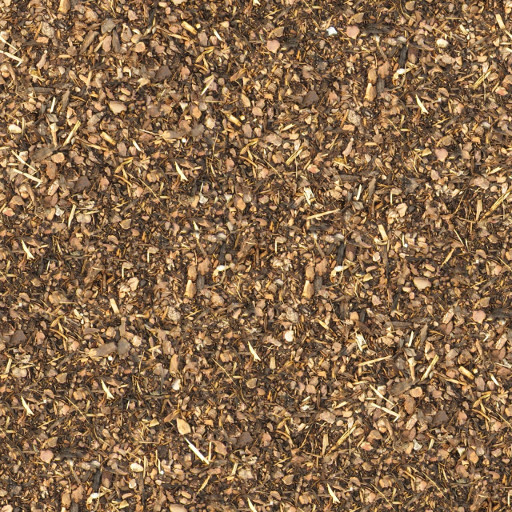
For this example, we'll be creating a woodchip block:
- Create a new file named
Woodchips.boo - Download the woodchips texture (to the right) and put it in the same
folder named
woodchips.jpg - Put the below code into your
Woodchips.boofile - Use your new Woodchips block instead of Grass in your world
#include "macros"
import pluginbase.Objects.World.Blocks
import pluginbase.Attributes
import pluginbase.Dependencies

[Block("Woodchips")]
class Woodchips(BlockBase):
    @Dependency IResourceResolver _resolver
    @DefaultConstructor

    @Declare Name "Woodchips"
    @Declare TextureResource _resolver.Resolve("woodchips.jpg")
    @Declare MaterialType MaterialType.Organic
Now we have some nice woodchips:
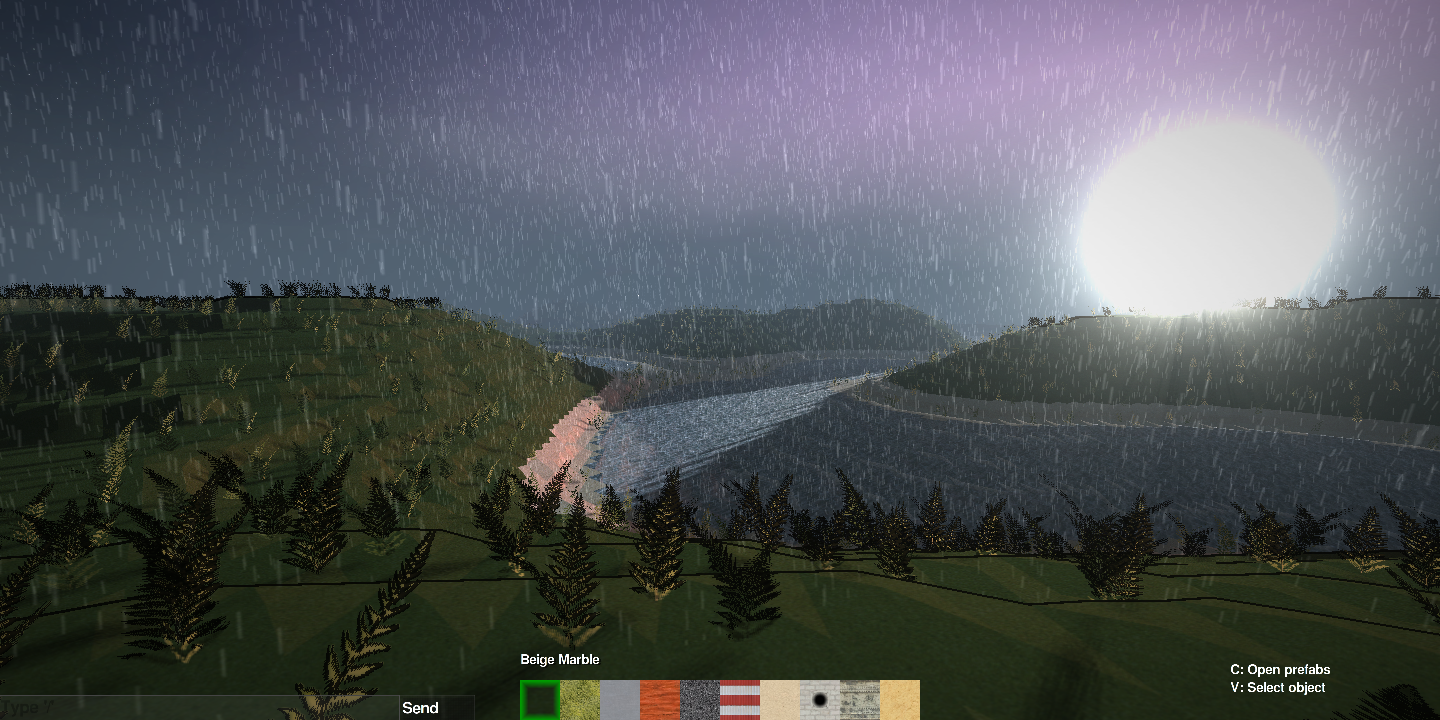
Using the builder plugin to turn it into a creative-type-game
Once you're happy where you have your plugin, it's time to try it out in a game! Here are the steps:
- Start up Empeld like you normally would (via the launcher)
- Hit singleplayer
- Hit New Game
- Make sure your mod is selected in the list of mods
- Scroll through the worlds on the next screen and select your world
- Select "Builder" for the Environment and Game mode.
- Start!
Now you can test out your new world using a creative building mode.
Here's what my world looks like:
Bocce compiler
Bocce is the preprocessor and compiler implementation for Empeld. It
makes sure that projects are structured correctly, adds some
pre-compiling directives, such as #include and other things. See
Bocce for more information about the internal preprocessor.
Most importantly, you can use bocce.exe in the game directory to
compile your code to make sure it everything is right before starting
the game. You can do this by running the following in your command
window:
bocce.exe -i pluginbase.dll -i plugins/essentials.dll -I boccelib/ -r plugins/myplugin
Share with friends! The next step is to show someone your good work.
Read Distributing your Boo Plugin to learn how to share your plugin.